List view | Rodeo Docs
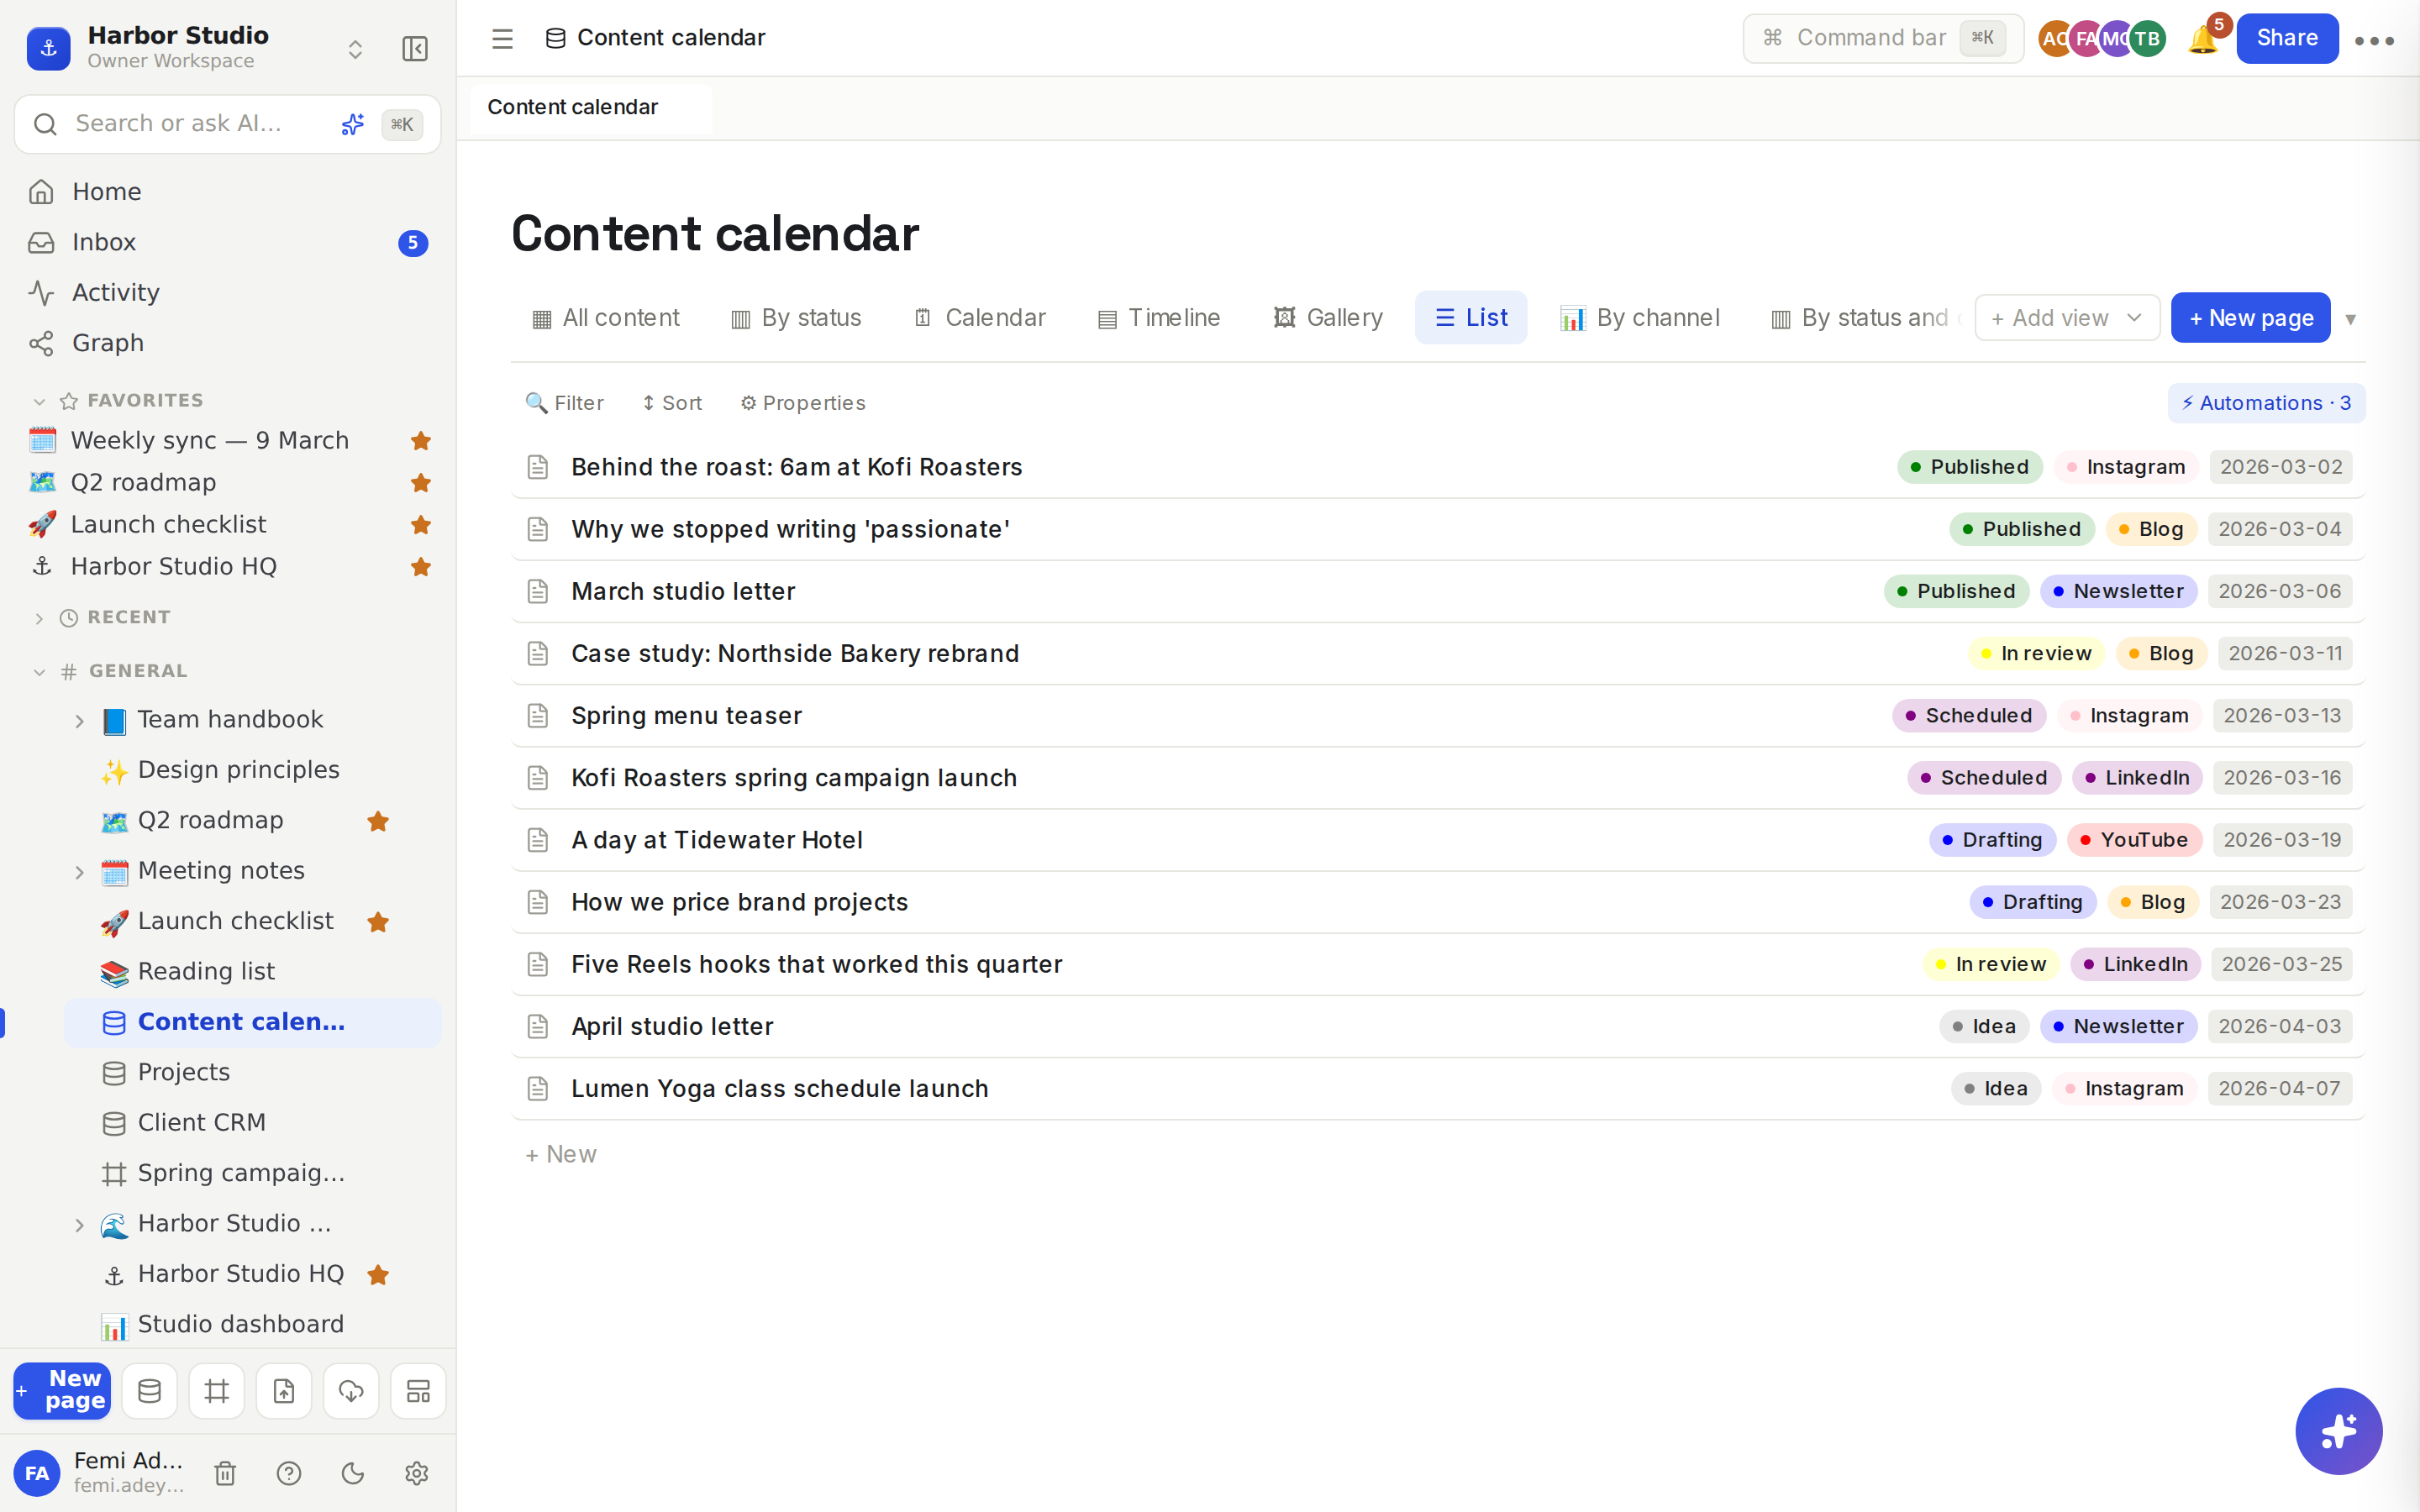
The list view shows each row as a single tidy line, its title on the left and a few key values on the right, so a reading list, a backlog or a set of notes is easy to scan and nothing more.
Do it
Make a list
Click + Add view and choose ☰ List.
Double-click the tab to give it a name, for example "Reading order".
Choose what each line shows
Click ⚙ Properties in the view's toolbar.
Tick the properties to show beside each title, and untick the rest.
Each line shows up to four of the ticked properties that have a value. Select, status and multi-select values show as coloured tags; other values show as small grey labels.
Use it
Click a line to open the row's page in a side panel. See Row pages and row templates.
Click + New under the list to add a row.
When a list is empty, it says "No rows yet."
Tips and limits
Keep it short. A list is at its best with one or two values per line. For editing many values at once, switch to a Table view.
Sort it. A list follows the view's sorts, so sort by Publish date or by Status to set the order. See Filters, sorts and grouping.
Untick Person, Files & media and Relation properties in ⚙ Properties: the list shows them as plain text rather than as names and chips.
Long lists load 100 rows at a time and fetch more as you scroll.
The list view works on every plan.
Ideas
A reading list. One row per article with a Status of To read, Reading or Done, sorted by status, so Mia always knows what's next.
Meeting notes. A database of meetings shown as a list sorted by date, newest first. Every line opens the full notes. See Meeting notes.
A lightweight backlog. Ideas for the studio's own site, one line each with a priority tag, that anyone can add to in seconds.